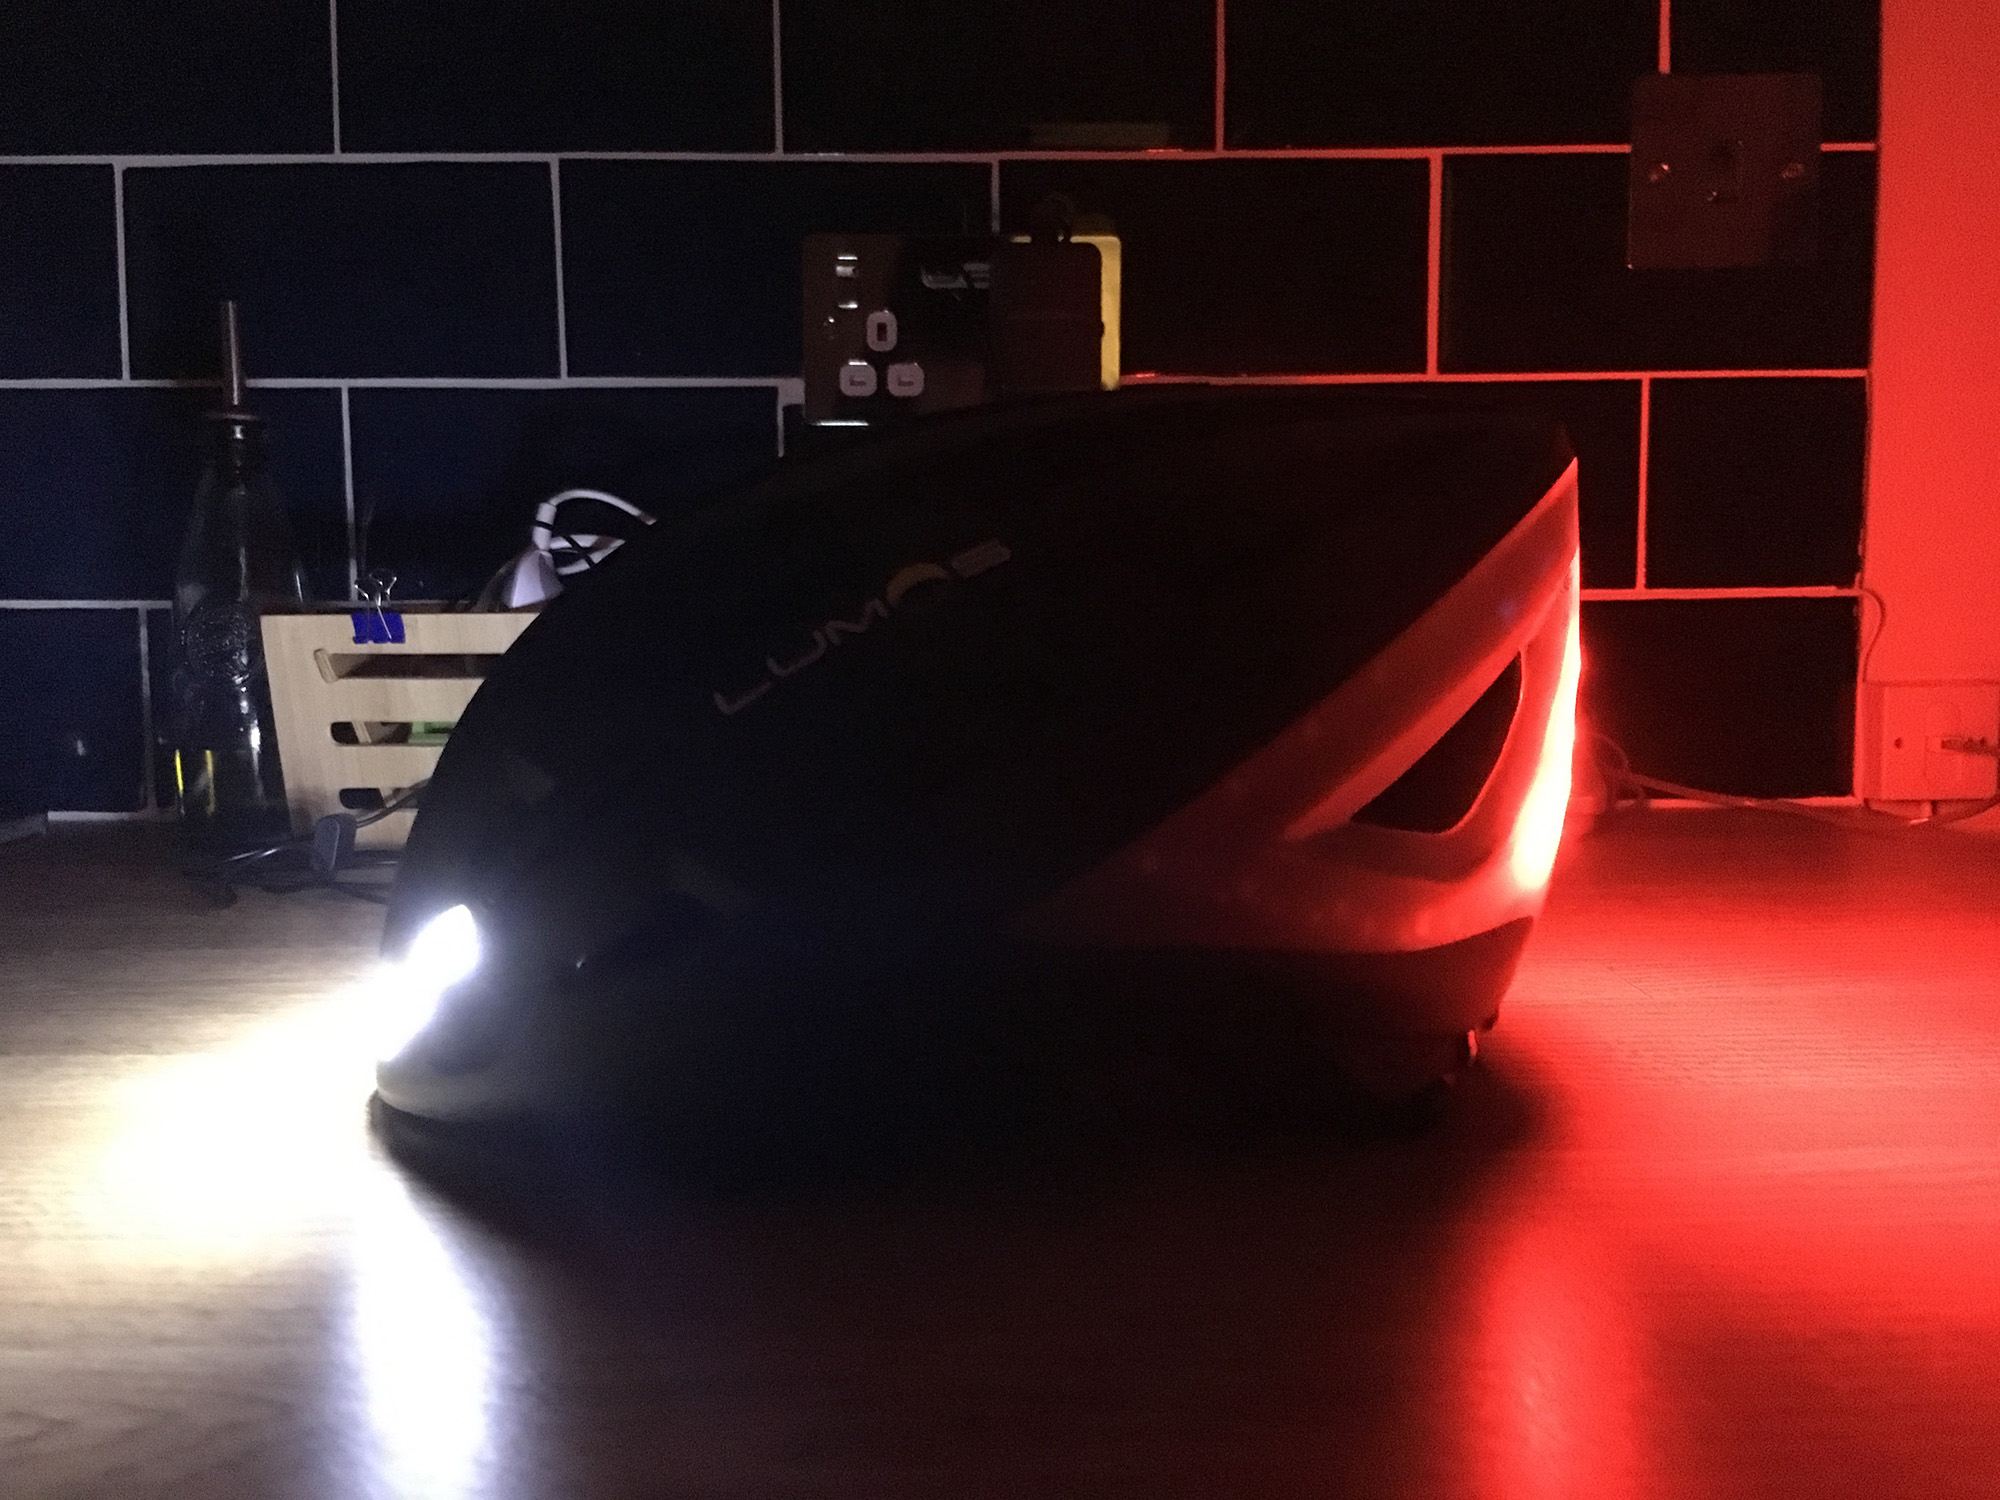
Year in Cats-3606 by Tom Royal on Flickr
Year in Cats-3407 by Tom Royal on Flickr
Year in Cats-3207 by Tom Royal on Flickr
Year in Cats-3125 by Tom Royal on Flickr
Year in Cats-3045 by Tom Royal on Flickr
Year in Cats-2790 by Tom Royal on Flickr
Year in Cats-2600 by Tom Royal on Flickr
Year in Cats-2500 by Tom Royal on Flickr
Year in Cats-2494 by Tom Royal on Flickr
Year in Cats-2249 by Tom Royal on Flickr

You're using a very old version of Internet Explorer which can't show the photos that should be in this box. Please consider upgrading to a newer version of IE or an alternative such as Firefox. Thanks.

Around Tohoku in Two Minutes

February 14th, 2013

Last year I visited Tohoku – the north of the main island of Japan – with my big old camera, and took a lot of pictures. This week, Helen's off on a trip, so I went to empty the biggest memory card I own for her – and found the 975 photos I took still sitting there in sequence.

Flicking through, I noticed that they form a sort of flippad-like video – I tend to take photos in bursts of three or four – so here's a little experiment. All 975 unprocessed images were stitched together in Premiere to make this composite. showing, roughly: Tokyo, Sendai, Yama-dera, Matsushima, Morioka, Tazawa, Hirosaki, Aomori, Aizu-Wakamatsu and back to Tokyo.

I thought the result was quite nice, so I'm sharing it here. If you fancy visiting Tohoku – and please do, it's lovely, and in need of tourism after the earthquake – I've written a guide, here.


LowePro Fastpack 250 review

June 4th, 2011

I've just returned from reporting on Computex Taipei 2011 – another trip that means lugging all my usual reporting stuff plus a laptop, two cameras and all the gear that goes with them. This time, though, I took a secret weapon: a LowePro Fastpack 250 camera bag. Before buying it I wasn't sure if everything would fit in, or if it would do the job. So, in case you're looking for something similar, here's how I got on with it. The video above shows what you can fit in each pocket.

What it holds

The Fastpack has five pockets. Two are small and suitable for cables, passes etc. The big ones are the laptop pocket, the camera section and the top pocket. The laptop pocket holds the computer up against your back, and is padded on both sides. It takes a Macbook Pro 15 comfortably (about 5cm to spare at the top) and zips up securely.

The camera pocket has three sections: one for a DSLR and two on the sides. It'll take a lens measuring up to 18cm long, but if yours is smaller a divider allows the rest to be used as a fourth compartment for another lens or charger etc. My D80 camera body fits with loads of room on both sides, so I think it'd take any pro-sized DSLR without trouble. The side pockets are roughly 17cm by 5cm by 13cm deep, and can be divided into two shallower units each. I managed to pack my Sony HD camera into one, with the divider holding it securely, and a shotgun microphone on top.

The whole camera pocket zips closed, and I had no worries that it would fall open. A flap secures over the top with two plastic clips.

The top pocket is surprisingly big. It'll just about take an iPad, plus several notepads, power adapters and cables. It becomes a bit fiddly to use when packed full, but at least you can get everything in there. A few pockets hold pens, cards and so on.

Using it

The rucksack straps are padded well, and there's also a belt – this isn't padded, and isn't terribly comfortable, but it does help to take some of the load when the bag is really full. Otherwise, just the back straps should be sufficient. There's a decent grab handle on top for hauling it in and out of luggage lockers, tube trains etc. It's important to note that the camera pocket is not suitable for quick access: it takes a minute or so to get equipment in or out, so this is one for lugging gear when not in use. The bag fits into the overhead compartment of a plane easily.

Water, etc

I dragged the bag around Taipei in the rain and >90% humidity. Nothing got wet or broken, but unlike other LP kit there's no fully waterproof cover. I'd call it 'showerproof' – if going somewhere really wet you'll need something better, or a separate cover.

Buying it

So, would I recommend it? If you only need a camera bag, no – get something smaller and fully waterproof. If on the other hand you need to lug loads of kit on aircraft, knowing that it'll be protected from travelling knocks, then absolutely: the Fastpack does everything I hoped it would and more.

This model usually costs around £80, but is available from Amazon here for around £50. A larger version that can take 17in laptops is available here – the RRP is £90 or so, but Amazon has this for under £50 (less than the smaller model).

The Catprentice

May 15th, 2011

Who will Sir BusinessCat choose as his apprentice, and who will get fired? A test using a chromakey sheet and the Creative Vado HD camera I bought the other day.

Ten video tips for untrained print journalists

February 24th, 2011

The video camera: somewhat trickier to use (and harder to replace) than a biro

When I started training to be a journalist digital still cameras were still new and ludicrously expensive, and even written news didn't always go onto the web. All you had to take out and about was a biro. Since then things have changed to the point where I'm now travelling with this back-breaking pile of electronic mayhem in my bag, shooting interviews and pieces-to-camera that get edited in a blur of minibar cuisine and uploaded the same day. And it's not always easy.

I haven't received any training in how to do this, and don't claim to be a video journalist – I'm a print hack with a camera (and without a camera crew) – but at this year's CES I finally think I managed to get the hang of it. So, for whatever it's worth, here are the ten things I wish I'd known a few years ago when I started shooting video reports.  Think of it it as a bluffing writer's  guide to video.

1) Get the right kit

Some of this is obvious. You need the right camera, and this is tricky – pro models cost a fortune, are fiddly to use and weigh too much, but consumer cameras will struggle with iffy lighting and external microphones. For CES and Taipei I used a Sony HXR-MC50E (picture above) owned by our publishers, and found it great: it's small enough to carry in a LowePro DSLR bag, takes a shotgun microphone and records AVCHD high-def video to an internal SSD – plug it into a laptop via USB and you can copy the footage in minutes. I believe Canon makes similar high-end consumer models.

As well as the camera you'll need a decent microphone: built-in microphones suck. Shotgun microphones work fine for both interviewing and pieces-to-camera providing there isn't too much background chatter – see below. A tripod is absolutely essential – with the Sony camera I used a Velbon CX-540, designed for DSLRs – it's lighter and smaller than video tripods. It's also cheap, which is just as well as my last one was smashed up during the flight back from Vegas (thanks, Virgin Atlantic!).

Never, ever, shoot without a tripod. Ever. No matter how steady things look on the preview screen, the results will suck.

And you'll need a computer with editing software. I like Sony Vegas on Windows, but take whatever you prefer. Obviously the quicker the laptop the better when it comes to rendering – an i5 processor made my life much easier at CES. Finally, also take headphones with a very long cord, spare USB cables and an Ethernet cable. I'll explain why.

2) Know your video spec

You'll need to know exactly what format of video you should be uploading, as CMS systems are far more picky than, say, Youtube. Know the codec, container (if applicable) and dimensions you'll be working with, set these up as presets on the laptop and upload a sample file before travelling. If it doesn't work, you'll have time to suss out the problem.

3) Set up your titles and projects at home

Editing video in a hotel room with jetlag is no fun, so do the hard work before leaving the UK. Set up your video project files, and add any necessary title cards and captions – these can be duplicated, or deleted if not needed for a particular video. Save the project files as read-only to prevent accidental overwriting. Again, test these out by rendering and uploading to make sure it all looks OK.

4) Blank the camera

You really, really don't want to be fishing around in a million video clips of other events to find the one you want, so wipe the camera's hard disk or tape before you start shooting. Also, set the camera to local time so the clip timestamps make sense. Keep a list in your notebook of every clip recorded, in order, and who's in it – this makes editing so much easier.

5) Shoot wide in HD

If you're uploading at the best resolution recorded by your camera then you'll need to frame the clips properly – not so easy if you're filming and interviewing yourself. So, if your output resolution is lower, set the camera to 1080P or 720P and frame each clip nice and wide – that way heads and limbs won't be chopped off if people move around. It's easy to crop in on the video to tighten things up when editing, but impossible to rescue areas that you didn't film in the first place. With that done flip the screen around, if possible, so you can see it while you're interviewing.

6) Check the bloody sound

Sound can be trickier to get right. Once you've set the camera's image, plug the headphones in and check the sound: walk around to where you'll be talking, and check that you're clearly audible over the hopefully minimal background noise. If using a shotgun microphone, beware hubbub directly behind you – I had bad experiences with a taxi rank (Taipei) and a giant fake volcano (Vegas, where else) causing an annoying racket. If there's a problem, move – no point shooting an unusable interview.

7) Instruct the interviewee

If you're interviewing, explain what's going on to your subject: how you'll introduce and end the clip, roughly how many questions you'll be asking, that sort of thing. Tell them to talk to you, not the camera. If interviewing from off camera, stand behind it and to one side, and get them to talk at you. If you don't do this people will keep glancing at the camera, or sometimes stare at it the whole time.

On a related note: check the subject's name, write it down, and ask them to spellcheck it. I conducted an entire interview calling the subject by the name on his show pass – it belonged to someone else. Oops.

8) Plan your piece

If doing a piece-to-camera, plan it out beforehand: think about what you want to include, the best order to discuss these sections and how you can introduce and wrap it up. Work out where you'll be cutting to other clips with audio and be sure to leave a long enough pause to do so without a harsh cut (5 seconds or so). I found that a bullet point list that I could glance at each time I'd be cutting away to other footage helped me to keep on track.

9) Take two. Or three. Or more.

After doing your first take, watch it back and look for annoying mannerisms: I tend to start every clip with the word "so", for example, and flap my arms like a lunatic. Note these down then try again without them (if you too suffer from flappy-arm-syndrome, hold onto a notebook with both hands). Also check for gurning idiots and/or other distractions in the background – at shows this can be tricky.

Also, once you've managed a usable take with no stumbles, errors or passing helicopters, try doing one more – I found that the second is normally much better. Mark the good takes in your notebook.

10) Hunt the WiFi!

Armed with project files and encoder settings that are ready to go and a notebook full of clips that you know are good, editing should be simple. When it comes to uploading, though, you're at the mercy of the hotel internet connection. Use your Ethernet cable if there's a socket, or failing that try Wifi. If the Wifi's rubbish try roaming the hotel or staking out the reception. If that fails try other hotels (the more expensive the better – maybe you can sit in the bar or lobby) or, if all else fails, McDonalds. Urgh. Remember that good quality clips make for large files, so you might be in for a wait.

Anything Maru-chan can do..

November 21st, 2010

Hunter can do. Sort of. Also in 720p high-definition here.